
The Short Answer
A successful paver installation is planned across 10 steps before any contractor walks the property — define project goals, walk the site, decide layout, choose materials, plan drainage, identify permits and HOA approval requirements, set budget with proper contingency, time the install around seasons and lead times, vet contractors, and lock design before construction starts. East Bay paver projects that skip planning steps run 20–40% over budget; planned projects hold within 10%. The decisions that determine cost and outcome — base depth, drainage routing, material spec, layout, permits — get made before any bid arrives. This checklist gives you the framework to make those decisions in the right sequence.
Learning how to plan a paver installation correctly is the difference between a project that runs smoothly and one that generates change orders from day one. Use this 10-step framework as your working document — it's designed to be copied and filled in as you move through each phase. For the full picture of what professional paver patio installation requires on East Bay clay-soil lots, start here and then dig into the technical detail as each step demands it.
Why Does Paver Project Planning Matter More Than Planning Other Home Improvements?
Paver projects fail in planning more often than in construction because the decisions that determine outcome — base depth, drainage routing, material spec, layout, permits — get made before any bid arrives, and most homeowners walk into bidding without those decisions made.
Three reasons make paving uniquely planning-sensitive. First, paver decisions are visible for 25–50 years. A paint color changes in a weekend. A paver layout that doesn't match how you actually use the outdoor space gets lived with through multiple home sales. Second, East Bay luxury paver projects regularly involve utility trades — gas rough-in for outdoor kitchens, electrical for lighting and outlets, irrigation relocation — and each trade adds permit timelines that stack. Start those conversations late and your install date slips 4–6 weeks with no recovery. Third, the cost of changing course rises sharply the moment ground breaks. A layout change after excavation is 10x more expensive than the same change during planning — you're paying crews to stop, regrade, and restart.
For the full technical picture of what separates a durable install from a failing one, the professional paver installation category guide covers every build dimension in depth.
Step 1: Define Your Project Goals and Primary Use Cases
Start paver project planning by defining 3–5 specific use cases the finished space must support — outdoor dining for 12 people, vehicle parking with a turning radius, walkway from driveway to entry, poolside circulation, fire-feature seating — and the lifestyle outcome you want before you pick a single paver color.
What to do: Write the use cases on paper and rank them by importance. Identify any non-negotiables — a dining table for 8 requires at least 180 sq ft of flat patio surface. Think about Saturday-night entertaining on an Orinda hillside patio versus a practical walkway upgrade on a Walnut Creek flat lot — the use cases are different, which means the layout, materials, and budget requirements are different. Share this document with every bidder.
Common mistake: Starting with paver style or color before defining what the space is for. Picking Belgard Holland Stone in Charcoal because you saw it on Instagram and then trying to make the layout work around it produces a beautiful material in the wrong configuration.
Deliverable: A one-page use-case document with 3–5 ranked use cases and any non-negotiables. This document gets shared with every contractor you invite to bid.
Step 2: Walk the Site and Assess Physical Constraints
Walk the project site three times before bidding — once dry, once during or right after rain, and once at the time of day you'll use the space most — to identify drainage paths, sun and shade patterns, neighbor sight lines, and existing utility locations.
What to do: Photograph each walk. Run a garden hose at the uphill edge of the project footprint and photograph where water goes. Sketch approximate utility paths — gas, electrical, irrigation laterals — using visual cues like valve boxes, meter locations, and head locations. Mark any grade changes, tree roots, or existing hardscape edges that will affect the layout. On hillside Lafayette and Orinda lots, pay specific attention to where winter runoff arrives at the proposed paver footprint from uphill — this observation directly informs Step 5. Understanding what causes driveway pavers to sink or shift starts with exactly this kind of site-walk diagnosis.
Common mistake: Relying on a single sunny-day walk that misses winter drainage behavior. The biggest surprises during East Bay paver construction — saturated soil, unexpected water routing, utility conflicts — are visible before the bid if you've done the wet-season walk.
Deliverable: An annotated site photo or sketch showing drainage flow, approximate utility locations, shade pattern by time of day, and any physical constraints that will affect layout or base depth.
Step 3: Decide on Layout, Scale, and Design Language
Lock paver project layout, scale, and design language before any contractor bids — the layout decisions determine 60–70% of the project cost, and bidders need the same layout to bid the same thing.
What to do: Sketch 2–3 layout options at rough scale. A landscape designer's two-hour consultation ($150–$400) to generate a scaled plan pays for itself in bid comparability. Decide on the design language: modern rectilinear with large-format porcelain, traditional running bond with Calstone Country Manor, Mediterranean with tumbled travertine. Confirm that the scale of the layout actually serves the use cases from Step 1. A patio that seats 8 for dinner needs to pencil out on paper before contractors start bidding. For scope guidance on what a full-service patio build actually covers, see 12 features full-service paver patios should include.
Common mistake: Letting contractors propose the layout during bidding. They'll all propose different things, often driven by what they're comfortable building or what maximizes their margin. The bids become incomparable because they're not bidding the same project. Incomparable bids are useless for decision-making.
Deliverable: A single locked layout sketch with approximate dimensions and the design language defined. Every contractor who bids works from this document.
Step 4: Choose Materials — Pavers, Base, Polymeric Sand, Edge Restraints
Lock specific material SKUs before bidding — paver brand, model, and color (Belgard Holland Stone in Charcoal, Calstone Country Manor in Slate, Techo-Bloc Blu 60mm in Antika, etc.); Class II base aggregate; ASTM C33 bedding sand; polymeric joint sand by SKU; PVC edge restraint with 10-inch spike spacing — so every contractor bids the same materials.
What to do: Visit paver showrooms. Belgard, Calstone, and Techo-Bloc all have Bay Area dealers with full display yards — walk them with photos from your site so you see how the material looks in your actual light conditions, not the showroom's. Lock 1–2 paver options. For driveways, confirm 80mm vehicular-rated pavers. For patios, 60mm is standard. For joint sand, name the product: Techniseal HP NextGel or Alliance Gator Maxx for driveways; SEK Pro for pedestrian patios. Don't leave joint sand as an unspecified "polymeric sand" line item. A paver driveway installation and a patio have different vehicular-load requirements — the material spec needs to reflect that distinction.
ASTM C33 is the American Society for Testing and Materials standard that defines the gradation and quality requirements for fine aggregate used as bedding sand beneath interlocking concrete pavers.
Common mistake: Leaving material as "allowance" line items. Allowance lines get substituted. A bid that says "paver allowance: $4.50/sq ft" can accommodate almost any paver on the market — most of which a contractor prefers over the Belgard or Calstone you specified, because they're easier to source or carry a better trade margin.
Deliverable: A written material spec list with brand, SKU, color, and application type for each line item — pavers, base aggregate, bedding sand, joint sand by SKU, and edge restraint product. This spec sheet attaches to every bid invitation.
Step 5: Plan Drainage From Day 1, Not as an Afterthought
Plan paver drainage during the design phase — surface grading at 1 inch per 8 feet sloped away from structures, French drains routed where uphill water arrives on hillside Lafayette, Orinda, and Moraga lots, and Contra Costa County stormwater compliance for impervious surfaces over 2,500 sq ft — before any contractor bids.
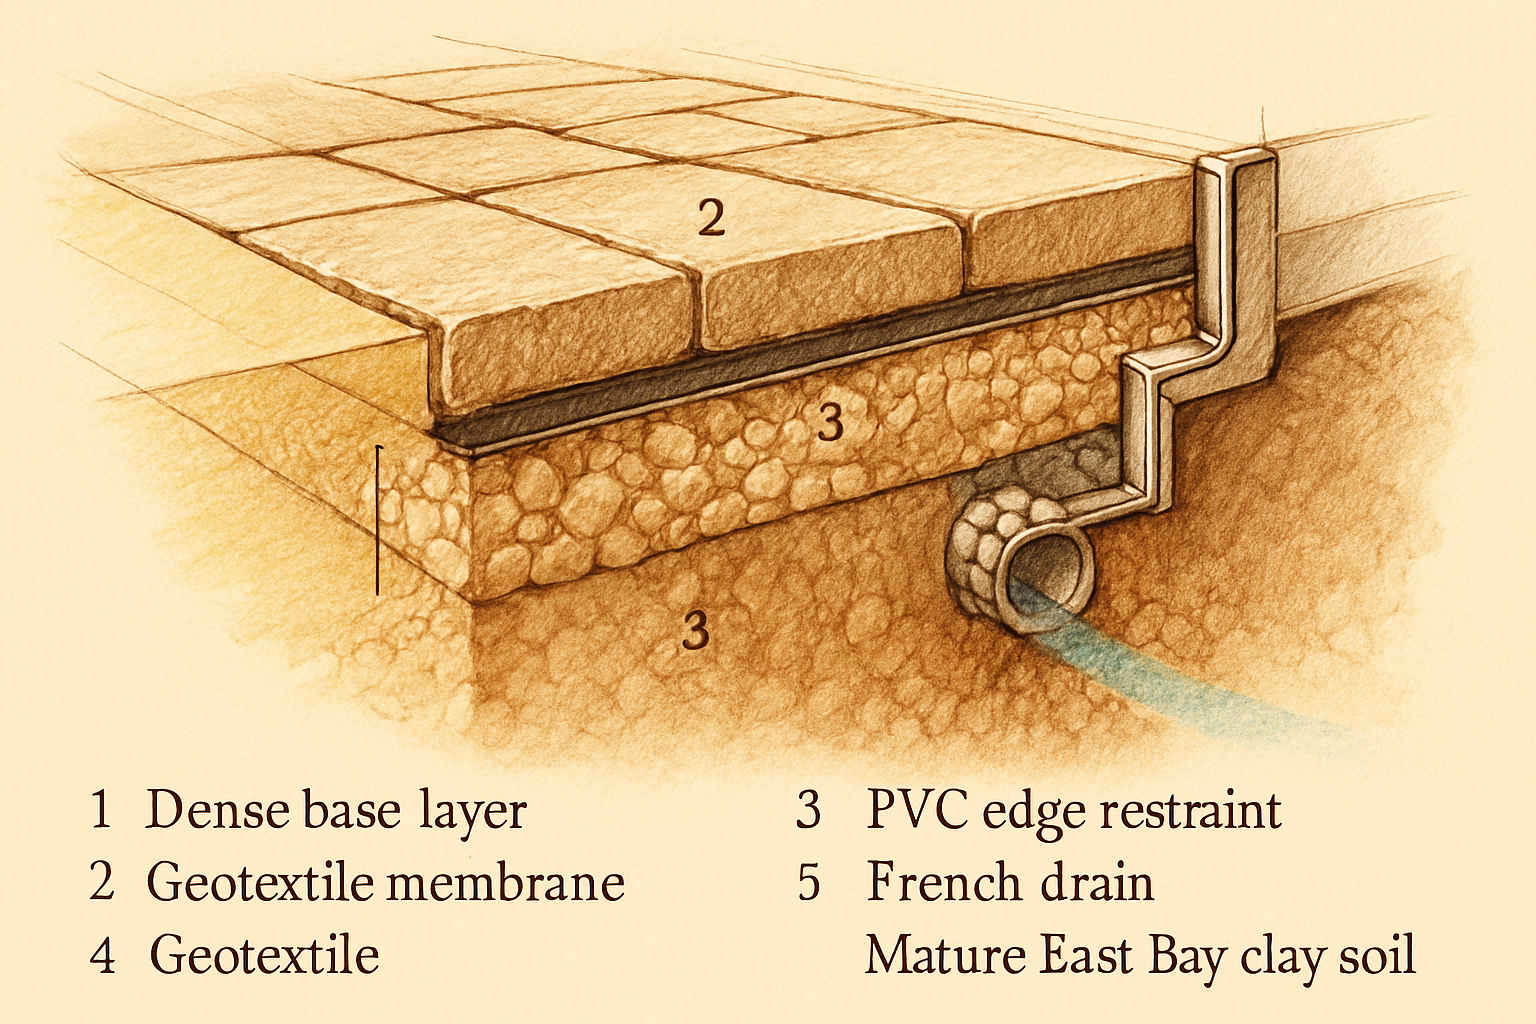
What to do: Use the site walk data from Step 2 to map where water arrives at the project footprint during rain. On properties above Route 24 in Orinda or on hillside parcels in Lafayette's upper neighborhoods, uphill runoff typically reaches the paver footprint regardless of how the paved surface is graded — those lots require a French drain at the uphill edge as part of the base scope, not an add-on. On flat Walnut Creek or Danville lots, surface grading alone usually handles drainage. Identify the drainage outlet: where does water exit the paver field? A named outlet — channel drain to street, French drain to daylight at the back slope, yard drainage connection — should appear in scope before bidding. If your combined paver footprint across driveway, patio, and walkway approaches 2,500 sq ft, check Contra Costa County stormwater compliance requirements before setting the scope — permeable paver systems may affect your bid spec. For a deeper breakdown of how drainage engineering integrates with base prep, how professional paver installation prevents drainage problems covers every engineered element.
Common mistake: Assuming the contractor will figure out drainage. Some will. Many won't — or they'll value-engineer it out to compete on price and call it a "drainage allowance" during construction when it's too late to shop the decision.
Deliverable: A written drainage plan that's part of your bid scope document — surface slope direction and named outlet, French drain included or explicitly assessed and excluded with the reason, stormwater compliance status confirmed.
Step 6: Identify Permits and HOA Approval Requirements Early
Identify permits and HOA approval requirements 6–12 weeks before you want construction to start — East Bay city permits take 2–4 weeks; HOA architectural review in estate communities takes 3–8 weeks; submitting both in parallel saves weeks on your project timeline.
What to do: Contact your city's building and permit counter directly. Lafayette, Orinda, Moraga, Walnut Creek, and Danville each have their own thresholds for when paving projects require permits, and those thresholds differ. Any project involving gas (outdoor kitchen or fire pit), electrical (lighting, outlets), or drainage connections to the street typically requires a permit regardless of square footage. If you're in an HOA, pull the Architectural Review Committee (ARC) submission requirements before you finalize the design — some communities have specific requirements on paver color palette, pattern, and edge treatment that affect your material decisions from Step 4. Communities in the Lamorinda area with active ARC review programs include Orinda Downs, Wilder, Orindawoods, and Burton Valley — if your property is in one of these, ARC submission should start as soon as your layout from Step 3 is locked.
Common mistake: Starting permit pulls only after contract signing. That approach adds 2–4 weeks to the schedule before a shovel moves. Permit applications in most East Bay cities can be initiated with preliminary plans — you don't need a signed contract to start the clock.
Deliverable: A written list of required permits by type, estimated fees, submission requirements, and HOA documentation if applicable — with submission dates that back-calculate from your target install start.
Step 7: Set the Budget With Proper Contingency
Set a paver project budget with three components — a base estimate from your project size and scope, a 10–15% buried-condition contingency for East Bay clay-soil surprises, and a 5–10% scope-change reserve for design decisions made during construction.
What to do: Research cost ranges for your project type and size. The large paver patio budget guide covers the cost-by-size framework for East Bay projects in detail. Once you have a base estimate, add both contingency layers explicitly. Buried-condition contingency covers surprises that are genuinely invisible before excavation: unmarked irrigation laterals, root systems from mature oaks, subsurface rock in hillside Lafayette lots, deeper clay profiles that require more base aggregate than the standard spec. These aren't contractor errors — they're field conditions. The scope-change reserve covers decisions you'll want to add during construction: an extra step riser, a wider landing, a lighting stub-up you didn't plan for. For projects involving outdoor kitchens or integrated features, the buried-condition contingency should be at the upper end of the range.
Common mistake: Budgeting only the base estimate and treating contingency as optional. East Bay paver projects without contingency are the ones that generate mid-project calls about "unforeseen conditions" that leave you choosing between approving a change order and stopping work mid-excavation.
Deliverable: A written budget document with base estimate, buried-condition contingency (10–15%), and scope-change reserve (5–10%) named as separate line items — plus a confirmed funding source for all three layers.
Step 8: Time the Install Around Seasons and Material Lead Times
Time East Bay paver installation for the dry-season window — April through October — with material orders triggered 4–12 weeks before the install start date based on actual lead times for your specified materials.
What to do: Lock your target install window first, then backdate from there. Material lead times for outdoor living projects in 2026 range from 2 weeks for stock pavers and standard appliances to 12 weeks for custom stone counters, specialty louvered pergolas, and imported porcelain. If your material spec from Step 4 includes anything custom — a specific Techo-Bloc series that's non-stock at your dealer, a natural quartzite counter for an outdoor kitchen, a specialty arbor or pergola system — check lead time at design lockdown and order immediately. Waiting until after contract signing to check lead time is a reliable way to push a May install into July.
Installing in the East Bay's dry season also protects the base. Freshly compacted Class II aggregate that gets saturated before the pavers are set loses compaction and has to be reworked. A rained-on base on Orinda Formation clay can set the project back 3–5 days. For a full breakdown of the coordination sequence that keeps trades, materials, and permits synchronized, how to coordinate an outdoor living build in 2026 covers the homeowner-side scheduling plan.
Common mistake: Signing a contract in February for a March install without confirming material availability. March is early in the dry season and contractors are booking up — a 4-week material lead time on a premium paver SKU makes March impractical.
Deliverable: A project schedule with material order dates, permit submission dates (from Step 6), and the install start date — each tied to the previous step's output so the timeline is traceable.
Step 9: Vet 2–3 Contractors and Request Line-Item Bids
Vet 2–3 East Bay paver contractors against a written checklist — ICPI certification, CSLB license number verified at cslb.ca.gov, three drive-by reference addresses in your area, a 5-year written workmanship warranty, and a line-item bid template — and send them a complete scope document so the bids are directly comparable.
ICPI (the Interlocking Concrete Pavement Institute) is the U.S. trade body that sets installation standards for interlocking concrete pavers, and ICPI certification for a crew lead confirms the installer has been trained to those standards.
What to do: Send every contractor the same package: your use-case document (Step 1), locked layout sketch (Step 3), material spec list (Step 4), drainage plan (Step 5), and budget range. Require that bids respond to each line item in your scope document — base depth and lift sequence, geotextile specified or not, material SKUs by name, French drain included or assessed and excluded with a reason, edge restraint product and spike spacing, polymeric joint sand by SKU. Ask for ICPI certification for the crew lead and verify the CSLB license number before inviting anyone to bid. A contractor without a verifiable CSLB license shouldn't be on your bid list regardless of how competitive the price looks. For the full vetting framework, the 9 contractor vetting questions covers every interrogation point you need before signing. You can also see how proper installation translates to real outcomes in 10 ways pro paver installation improves outdoor living.
Common mistake: Comparing lump-sum bids. A lump-sum bid tells you nothing about what's being built — the lowest number might mean the thinnest base and no geotextile. Line-item bids expose those differences before construction, not after.
Deliverable: Two to three line-item bids built from the same scope document, with CSLB license numbers verified and ICPI certification confirmed for each contractor before the bids are reviewed.
Step 10: Lock Design and Scope Before Construction Starts
Lock the final design — layout, materials, integrated features, drainage plan, and warranty terms — in writing before construction starts. Design lockdown is the formal written sign-off on layout, materials, features, and scope before construction starts, which protects both homeowner and contractor from mid-build scope creep. Design lockdown reduces change orders 60–80% during construction.
What to do: Before signing the construction contract, confirm that every decision from Steps 1–9 appears in the contract language: layout dimensions, material SKUs by name, base depth and lift sequence, drainage plan with outlet named, permit pull responsibility, sub-trade licenses for gas and electrical, and warranty terms in writing. Review the contractor's material coordination plan — who orders what and when. Confirm that the pavers and any long-lead items are already on order. If your scope includes outdoor kitchen rough-in, fire feature gas line, or lighting conduit, confirm that the rough-in sequencing is noted in the construction plan — those stubs must go in during excavation, not after the pavers are set. For a full rundown of what a comprehensive patio scope should include before lockdown, 12 features full-service paver patios should include is the checklist to cross-reference.
Lamorinda Pavers' 5-year workmanship warranty covers base settlement, drainage failure, edge restraint movement, and joint sand failure — and that language belongs as a named line item in the final contract before signatures, not a verbal assurance after.
Common mistake: Leaving "small details to decide later." Every detail left open at design lockdown is a potential change order during construction. Change orders during active construction are expensive, stressful, and avoidable.
Deliverable: A signed design-lockdown document — either a standalone sign-off sheet or a clearly marked "design approved as specified" clause in the construction contract — that references the material spec list, layout, drainage plan, and warranty terms by name.
Common Planning Mistakes That Surface During Construction (and How to Avoid Them)
Five planning mistakes routinely surface during East Bay paver construction — and each one is preventable with disciplined planning executed in the right sequence.
1. Drainage planned mid-construction. When drainage routing gets figured out after excavation starts, the crew makes decisions under time pressure with a half-dug site. A French drain added mid-construction on a hillside Orinda lot costs 15–25% more than the same French drain scoped during design — because the trench routing has to work around existing excavation instead of being planned as part of it. The 11 DIY paver patio mistakes that ruin drainage guide shows exactly how drainage oversights play out in the field.
2. Allowance-based material lines. Any line item in a contract that says "paver allowance" or "polymeric sand TBD" is an open door for substitution. Contractors substitute to protect their margin or because your specified SKU isn't available — and you won't find out until the pallets are on-site. Named SKUs in the material spec eliminate this entirely.
3. HOA approval forgotten. ARC review in communities like Wilder, Orindawoods, Orinda Downs, and Burton Valley takes 3–8 weeks. A contractor ready to start in two weeks and an ARC process that hasn't started means a 3–6 week delay with a mobilized crew. Some HOAs also require submitted plans that differ from your permit drawings — coordinate both before starting either.
4. No design lockdown. Projects that start construction with open design decisions experience 15–30% scope creep on average. "We'll figure out the step count when we see the grade" becomes a change order for three extra risers, a retaining-wall extension, and the lighting conduit that wasn't in the original trench plan. For the specific bottlenecks this creates on complex builds, 10 outdoor living build coordination bottlenecks maps every downstream consequence.
5. Optimistic timeline. An April install that didn't confirm material lead times in January, didn't submit permits until March, and didn't get HOA approval until late March typically starts in June — 4–6 weeks later than planned. The dry-season window is long enough that this usually works out, but it compresses the install into peak contractor demand and reduces your scheduling leverage.
Lamorinda Pavers walks every East Bay paver project across Lafayette, Orinda, Moraga, Walnut Creek, and Danville through these 10 planning steps before contract signing. The planning document you build through these steps becomes the foundation of a bid we can respond to with a fixed-price proposal — not an estimate range — because the scope is defined.
Frequently Asked Questions
How do I plan a paver patio project?
Plan a paver patio project across 10 sequential steps: define use cases, walk the site, lock layout, choose materials by SKU, plan drainage, identify permits and HOA requirements, set budget with contingency, time the install, vet contractors with line-item bids, and execute design lockdown before construction starts. The decisions that determine cost and outcome — base depth, drainage routing, material spec, layout — get made in Steps 1–7, before any contractor walks the property. Skipping steps doesn't save time; it shifts decision-making into construction where changes cost 10x more.
What should I decide before getting paver bids?
Before soliciting paver bids, lock five things in writing: a ranked use-case document, a layout sketch with approximate dimensions, a material spec list with named SKUs (Belgard Holland Stone in Charcoal, Calstone Country Manor in Slate, Techo-Bloc Blu 60mm, etc.), a drainage plan with a named outlet, and a budget with both contingency layers included. Contractors who receive a complete scope document return comparable, accurate bids. Contractors who receive a verbal description return estimates that can't be reconciled side by side.
How far in advance should I start planning a paver installation?
Start planning 4–6 months before your target install date for a standard East Bay paver patio or driveway. That timeline accommodates 6–12 weeks for permit and HOA submissions running in parallel, 2–12 weeks of material lead time depending on what's specified, and 2–4 weeks of contractor scheduling buffer during peak season. Projects involving outdoor kitchens, fire features, or integrated pergolas may need 6–8 months of planning lead time due to structural permit complexity and specialty fabrication timelines.
What permits do I need for a paver patio in the East Bay?
Permit requirements vary by city and project scope across Lafayette, Orinda, Moraga, Walnut Creek, and Danville. A standard paver patio with no utility connections often requires no permit. Any project involving gas rough-in, electrical conduit, drainage connections to the street, or structural retaining walls typically requires a permit regardless of paver square footage. Check with your city's building department directly — and if you're in an HOA, confirm ARC submission requirements at the same time, because those run on a separate track and can add 3–8 weeks.
How do I compare paver contractor bids accurately?
Compare paver contractor bids line by line against a shared scope document. Send every contractor the same layout, material spec list, and drainage plan and require line-item bids in return. Key comparison points: base depth and lift sequence (8–10 inches for driveways); geotextile specified or not; material SKUs by brand and model; French drain included or excluded with reason; polymeric joint sand SKU; and warranty terms in writing. A low lump-sum bid and a high line-item bid are not measuring the same project — they're not comparable.
When is the best time of year to install pavers in the East Bay?
April through October is the optimal installation window for East Bay paver projects. The dry season protects base compaction and prevents clay saturation before the pavers are set. Peak contractor demand runs May through August, so scheduling flexibility is highest in April and September–October. If you want an April install, material orders and permit submissions should start in January — material lead times range from 2 weeks for stock SKUs to 12 weeks for custom stone and specialty products. Installing during the rainy season adds base-management complexity that disciplined planning avoids entirely.
Complete Your Planning Checklist, Then Get a Fixed-Price Bid
The 10-step checklist above — use cases, site walk, layout, materials, drainage, permits and HOA, budget with contingency, timing, contractor vetting, design lockdown — is the complete framework for how to plan a paver installation that finishes on time, on budget, and on scope.
If you've worked through these steps and want a contractor to validate your planning before committing to a scope, request a free on-site estimate from Lamorinda Pavers. We'll walk through your planning document with you, validate the layout against the site grade and drainage routing, confirm the material spec against your base preparation and drainage requirements, and send a fixed-price proposal built around your locked scope in writing within 48 hours. The bid includes every planning item as a named line item — no allowances, no vague drainage references, no TBD material lines.
Across Lafayette, Orinda, Moraga, Walnut Creek, and Danville, this is how paver projects start with the planning that makes professional paver patio installation possible.
Contact us to schedule your site visit. CSLB License #1092749.